Update for August 2019
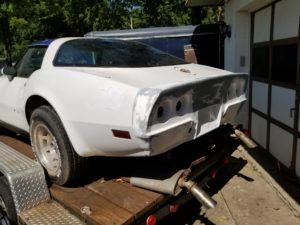
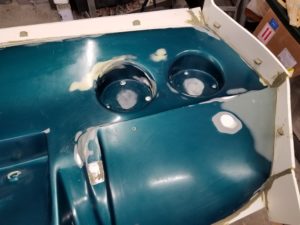
Things were off to a good start and I was finally able to pull a couple of parts from the mold. The heat and humidity had been a major pain this summer. But, as I was doing detailing on them and making some bumpers I noticed something on the prototype 76 car. I noticed that when I looked at it just right from a distance the upper right corner seemed a little off. So I made a little template and did a comparison from one side to the other….
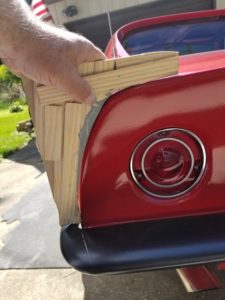
left upper corner
upper right corner
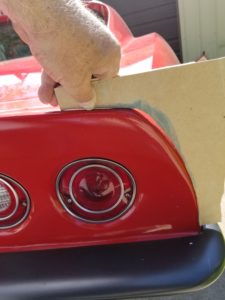
So I decided I needed to correct my mold and while working on that I made corrections to the parts that I already made. I knew I wasn’t going to sell those parts but would just use them on my own project cars, such as my 82CE and 74 convertable Big Block project. I got both sides to match pretty good using the template….’
upper left on new part
Upper right on new part
I use my 82 and 74 to verify the fit of the parts. As it happens the 76, 82 and 74 all have exactly the same fit. You often hear about how these cars have so many fitting issues but I think that is mostly cars that have had “something done” at one time or other.
82CE project car used to check fit
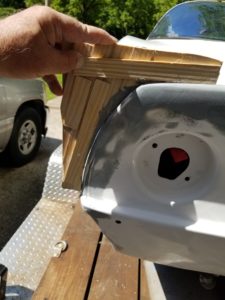
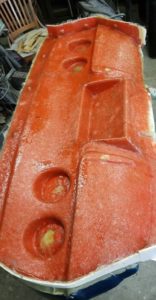
Meanwhile, back at the mold… I tried to correct the mold so that the upper right corner would be good. But when I went to make a new part I had a terrible result with the gelcoat. I wanted to try a black pigment in the gelcoat to be able to tell the old parts from the new. However even after 5 days the gelcoat still didn’t seem right. I thought it might have just been the weather so decided to try to lay up a layer of glass. The result was areas of the gelcoat would shift and wrinkle. Apparently it was not cured in some areas. I tested the resin on a piece of plastic and it hardened fine but when adding the pigment it stayed gummy. Bad pigment I think. Bad news was it took forever to clean the mold of residue left on it.
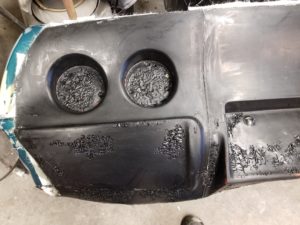
left side of part, note wrinkled surfaces
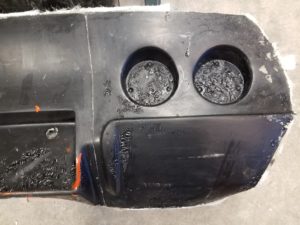
right side of part, more bad areas
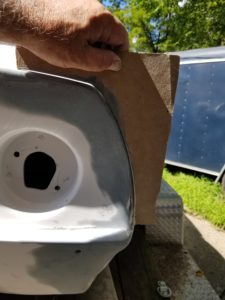
At this point I decided to cut my losses and work on making a new mold. Instead of trying to make minor corrections and repairs to the old mold I went back to my Master plug and made corrections to the right upper corner and generally went over the piece to correct any flaws I could find. One of the things that I had issues with was that the section that held the tail lights and the license plate area was made up of three sections. I had problems early on because of some of the angles causing mechanical locking of the molds. So I made it in three sections to deal with that, but ended up with seam lines that always needed more attention! So, when making this last mold I decided to make that back section in one piece and correct the mechanical locking issue. So now the entire part will be made with four subsections instead of six. You can see the seams I am talking about in the black part pics above.
left side of master plug
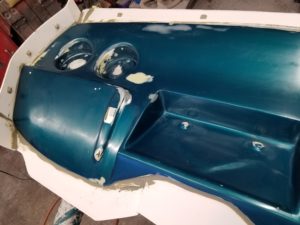
right side, upper right corner shape corrected
So… during this whole process I had decided to switch suppliers for my materials because in fact, not the first time I had problems with the materials I was receiving from the other supplier. My new master mold is coming along fine and I just finished the first section lay up. I’ll give it a couple of days to stabilize and then make the other sections for the mold. Then it will sit and cure up for a few days before I pull the mold from the plug. Hopefully it will all be good and after a dozen coats of mold release I can get back to making the part!
one piece for rear section now, instead of it being in three pieces